Getting Started
Managing Team
Octa GST supports multi-user access, making it ideal for teams that need to collaborate securely and efficiently.
- Add Multiple Users – Each team member can create their own login. The admin can then add them to his team.
- Assign Roles & Permissions – Admins can define access levels to control who can view, edit, or manage specific data and modules.
- Track User Activity – Every action is recorded in the Audit Log, allowing admin to monitor who performed which task and when.
With these features, admin maintains complete control over data security and user access — while enabling seamless teamwork within Octa GST.
Adding a User to Your Team
Register User's Account
Before adding a user to your team, they must first register their own account in Octa GST. Ask the user to open the Registration Page and complete the registration using their email address and mobile number.
They can also watch this short Registration Process Video for guidance.
Add to Your Team
- Log in using your Admin account.
- From the Home Page, open the Team section.
- Click Add User.
- Enter the user’s email ID and click Check to verify their registration.
- Once verified, the Add User window will appear.
- Configure the user’s access level — choose Read, Write, or Full Access.
- Set permissions at either the Company level or GSTIN level.
- Click Add to save the user.
- Confirm the user appears in the Team List.
You can edit permissions later from the same Team screen.

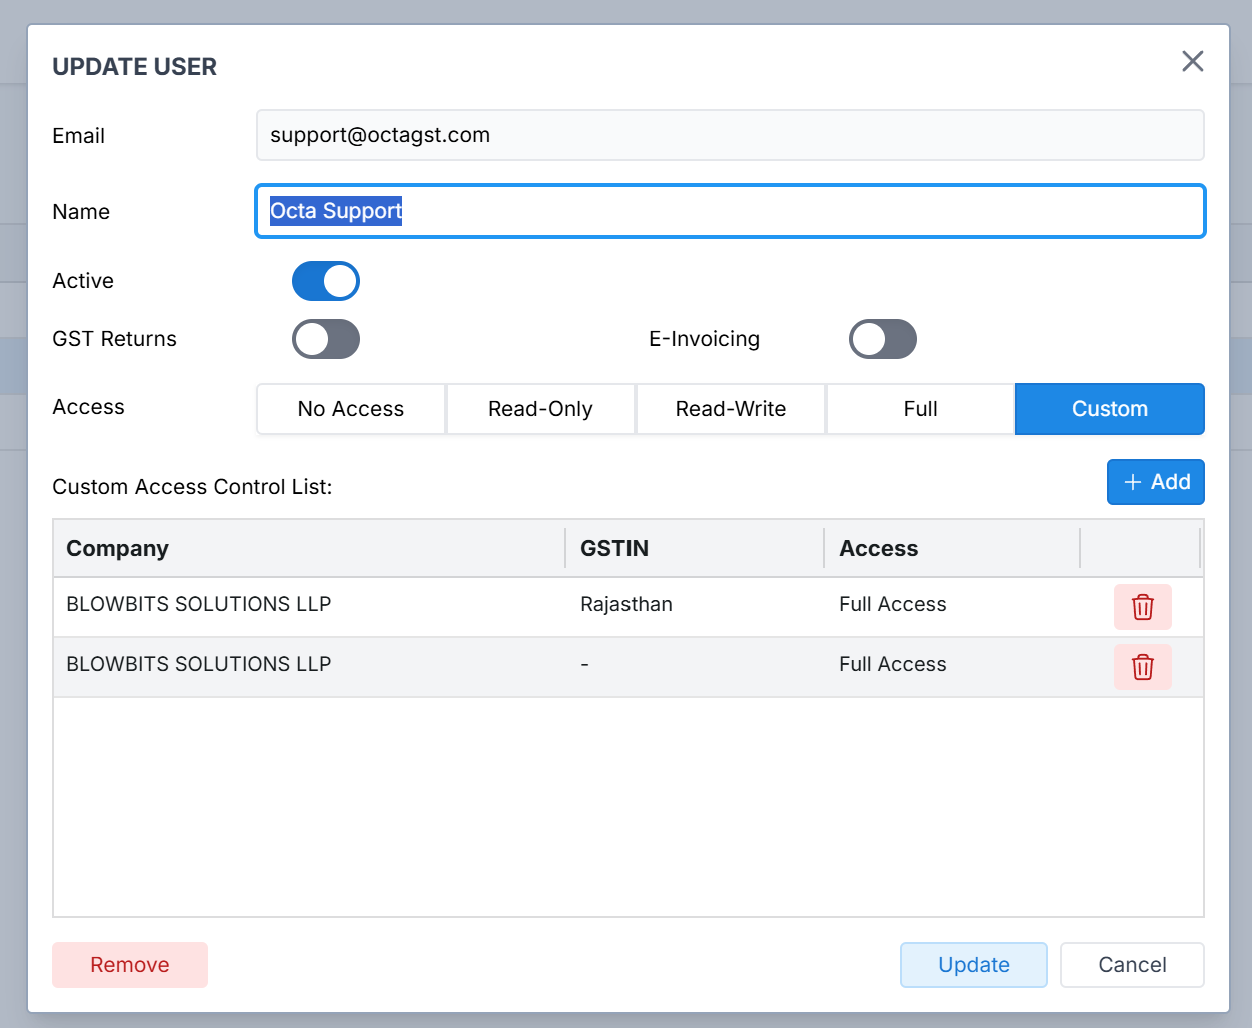
Advance Access Control
In Octa GST, the Admin can change a user’s access rights at any time. Permissions can be set to Read, Write, or Full Access. Additionally, the Admin can grant custom permission rights, enabling control over access at either the Company level or the GSTIN level for more precise and secure management.
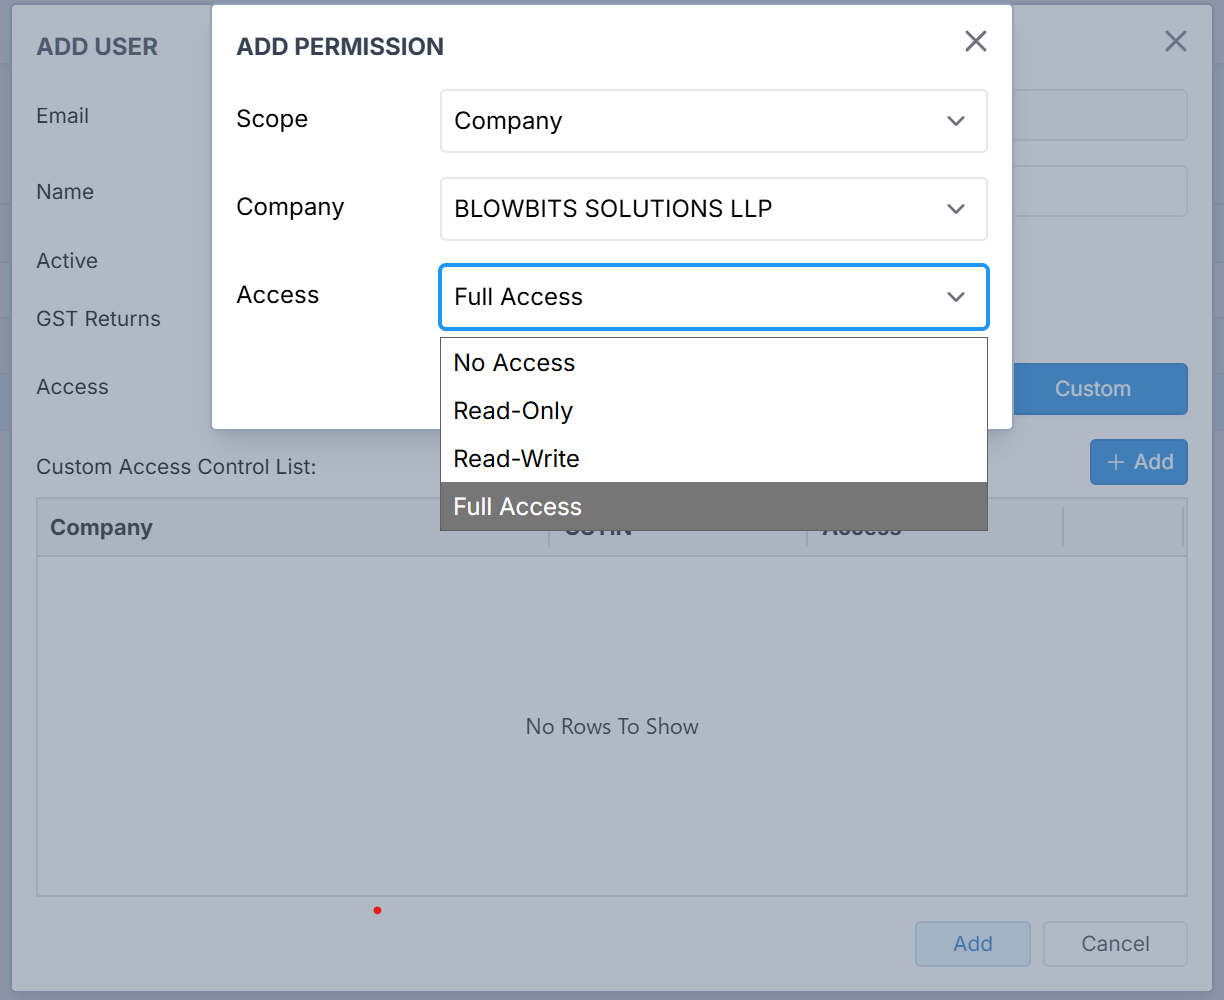
Step-1 Assigning Company-Level Access in Octa GST
Giving access at the Company level means the user can work on all GSTINs under that company. To do this, click on Custom Access in the Custom button > click the Add button > set the Scope as Company > select the company for which you want to assign permission rights > then choose the desired access level — Full, Read, or Write.
Giving access at the Company level allows a user to work on all GSTINs under that company. To assign this access:
- Click on the Custom Access button.
- In the Custom Access window, click the Add button.

- Set the Scope as Company.
- Select the Company for which you want to assign permissions.
- Choose the desired access level: Full, Read, or Write.
- Save your settings to apply the permissions
We can assign permissions for more than one company by clicking the Add button for each company and setting the desired access level.
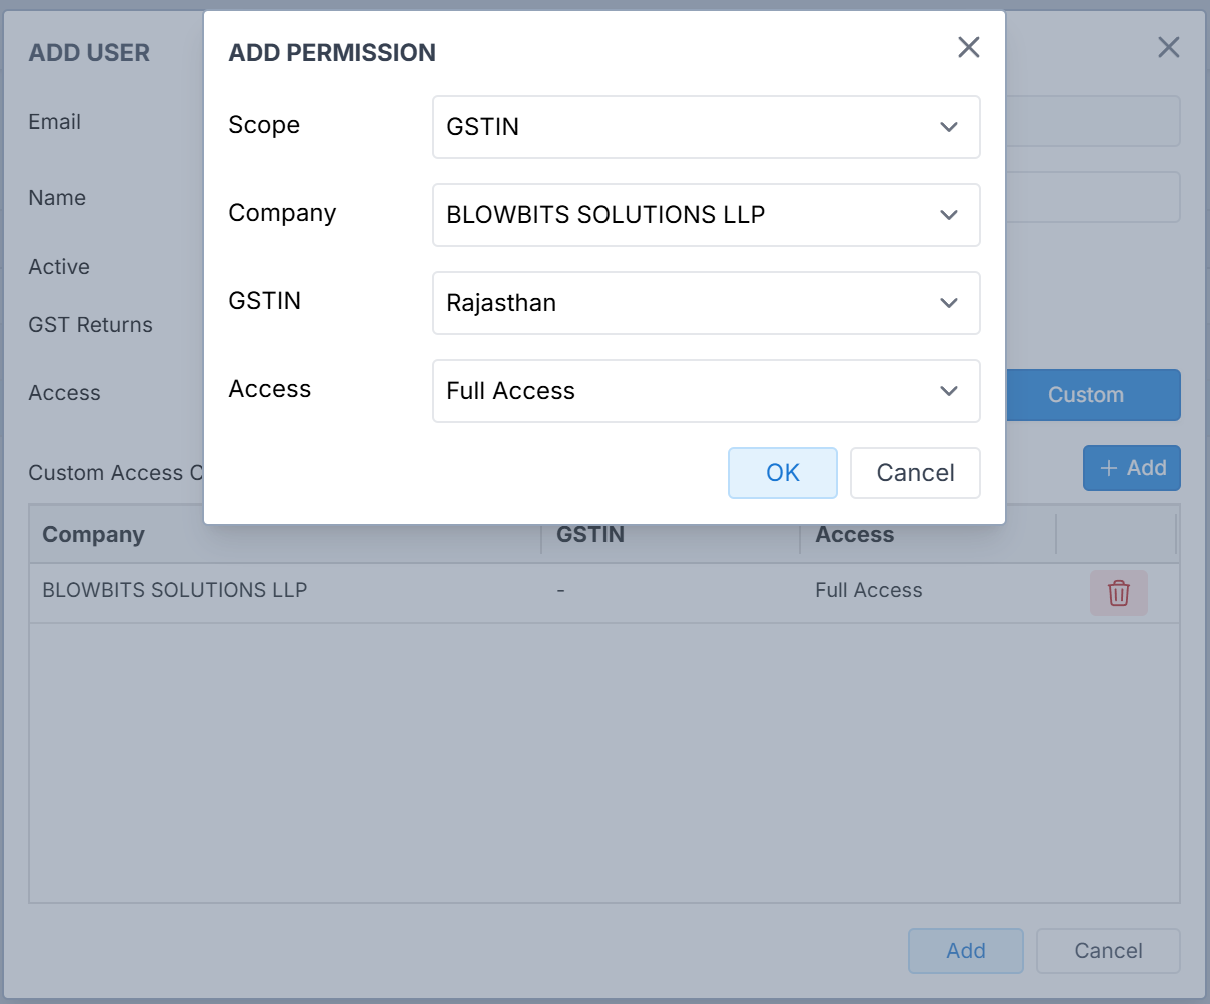
Step-2 Assign GSTINs Level Access
To assign access at the GSTIN level, the user must first have Company-level access. Once the company-level access is granted, follow these steps:
- Click Add in the Custom Access window.
- Click Scope and select GSTIN.
- Select the Company to which the user already has access.
- Choose the specific GSTIN you want the user to access.
- Assign the desired permission rights for that GSTIN: Full, Read, or Write.
- Click Save to apply the permissions.
🔐 Clarification on Custom Access: Company-Level vs GSTIN-Level
If a team member is given custom access only at the company level, and no access is provided at the GSTIN level, then:
❌ The user will not be able to access any data or modules related to that company.
This is because: While company-level access grants visibility to the organization structure, GSTIN-level access is required to view or work on returns, invoices, reconciliations, or any transactional data.
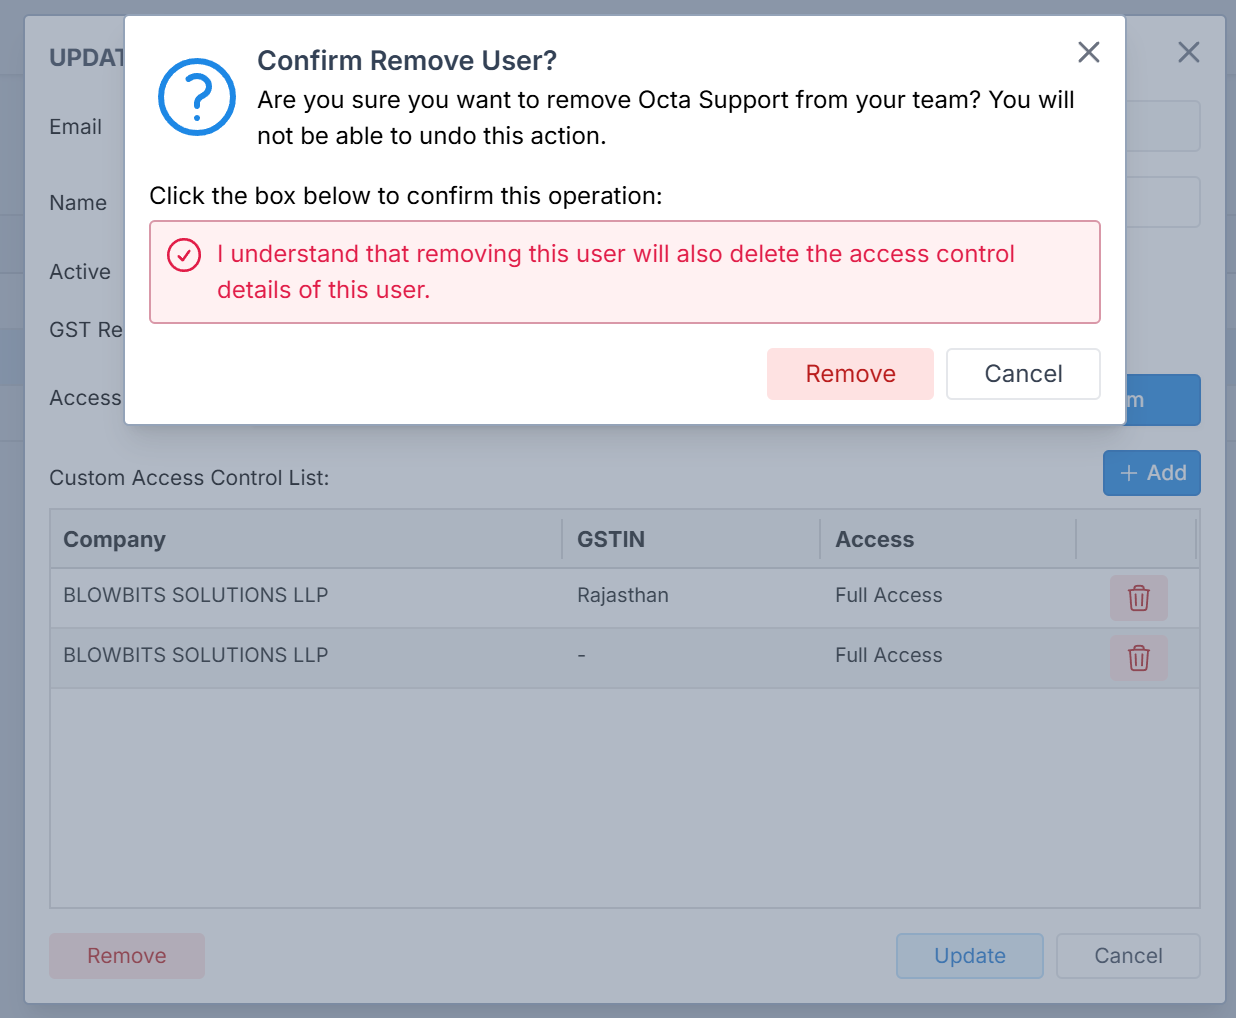
Removing a User from Your Team
You don't need to worry about companies or data. Removing a user from your team will not delete any companies or data, even if those companies were originally added by that user.
- Go to the Team page.
- Find the user you want to remove and click the Edit button next to their name.
- In the user details window, click Remove.
- A confirmation message will appear. Click I Understand to confirm your action and click Remove to confirm the
removal of user.